https://square.github.io/retrofit/
Retrofit
A type-safe HTTP client for Android and Java
square.github.io
레트로핏을 이용하기 위해서는 다음과 같이 의존성을 추가로 걸어야 한다.
(앱 단위의 Gradle)
    implementation 'com.squareup.retrofit2:retrofit:2.9.0'
    implementation group: 'com.squareup.retrofit2', name: 'converter-gson', version: '2.8.1'
간단한 예시 사이트는 다음과 같다.
https://codinginflow.com/tutorials/android/retrofit/part-1-simple-get-request
Part 1 - Simple GET Request - Coding in Flow
In this video series we will learn how to use Retrofit, which is a type-safe HTTP client for Android and Java. Retrofit allows easy communication with a web service by abstracting the HTTP API into a Java interface. In part 1 we will set up Retrofit in a n
codinginflow.com
이 페이지를 이용해 간단한 원리를 알아본다.
레트로핏은 json으로 날아오는 데이터를 파싱하여 출력해주는 라이브러리다.
그렇기 때문에 먼저 파싱될 데이터 모델을 요구한다.
Post.java
package com.codinginflow.retrofitexample;
import com.google.gson.annotations.SerializedName;
public class Post {
    private int userId;
    private int id;
    private String title;
    @SerializedName("body")
    private String text;
    public int getUserId() {
        return userId;
    }
    public int getId() {
        return id;
    }
    public String getTitle() {
        return title;
    }
    public String getText() {
        return text;
    }
}
그 다음, 데이터를 통신해줄 통로, 인터페이스 객체를 생성한다.
JsonPlaceHolderApi.java
package com.codinginflow.retrofitexample;
import java.util.List;
import retrofit2.Call;
import retrofit2.http.GET;
public interface JsonPlaceHolderApi {
    @GET("posts")
    Call<List<Post>> getPosts();
}
안드로이드는 기본적으로 외부 인터넷과의 연결을 제한해두고 있다. 먼저 인터넷을 허용하고, Android9.0 이상에서는 Https 서버(보안이 적용된 서버)만 통신이 가능하도록 설정되어 있다. 따라서 Manifast에 다음 코드를 추가한다.
AndroidManifast.xml
<?xml version="1.0" encoding="utf-8"?>
<manifest xmlns:android="http://schemas.android.com/apk/res/android"
    package="com.mary.retrofit2ex">

    <uses-permission android:name="android.permission.INTERNET" />

    <application
        android:allowBackup="true"

-- 하략 --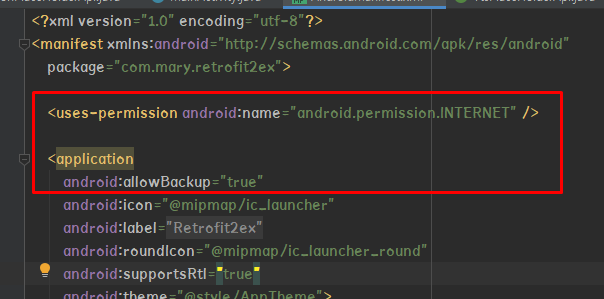
다음 화면을 구현한다.
Activity_main.xml
<?xml version="1.0" encoding="utf-8"?>
<androidx.constraintlayout.widget.ConstraintLayout
    xmlns:android="http://schemas.android.com/apk/res/android"
    xmlns:app="http://schemas.android.com/apk/res-auto"
    xmlns:tools="http://schemas.android.com/tools"
    android:layout_width="match_parent"
    android:layout_height="match_parent"
    android:padding="8dp"
    tools:context=".MainActivity">

    <androidx.core.widget.NestedScrollView
        android:layout_width="match_parent"
        android:layout_height="match_parent">

        <TextView
            android:id="@+id/text_view_result"
            android:layout_width="wrap_content"
            android:layout_height="wrap_content"
            android:textColor="#000" />

    </androidx.core.widget.NestedScrollView>

</androidx.constraintlayout.widget.ConstraintLayout>
다음 페이지에는 android 9.0 아래 버전이 사용되어 있기 때문에 android 라이브러리를 사용한다. 하지만 그 이상 버전의 개발을 진행중이라면 androidx 라이브러리를 사용하여 뷰를 만들어야 한다. 다 바꿔주길 바란다.
이제 데이터 통신만 진행하면 완료된다.
MainActivity.java
package com.codinginflow.retrofitexample;

import android.support.v7.app.AppCompatActivity;
import android.os.Bundle;
import android.widget.TextView;

import java.util.List;

import retrofit2.Call;
import retrofit2.Callback;
import retrofit2.Response;
import retrofit2.Retrofit;
import retrofit2.converter.gson.GsonConverterFactory;

public class MainActivity extends AppCompatActivity {
    private TextView textViewResult;

    @Override
    protected void onCreate(Bundle savedInstanceState) {
        super.onCreate(savedInstanceState);
        setContentView(R.layout.activity_main);

        textViewResult = findViewById(R.id.text_view_result);

        Retrofit retrofit = new Retrofit.Builder()
                .baseUrl("https://jsonplaceholder.typicode.com/")
                .addConverterFactory(GsonConverterFactory.create())
                .build();

        JsonPlaceHolderApi jsonPlaceHolderApi = retrofit.create(JsonPlaceHolderApi.class);

        Call<List<Post>> call = jsonPlaceHolderApi.getPosts();

        call.enqueue(new Callback<List<Post>>() {
            @Override
            public void onResponse(Call<List<Post>> call, Response<List<Post>> response) {

                if (!response.isSuccessful()) {
                    textViewResult.setText("Code: " + response.code());
                    return;
                }

                List<Post> posts = response.body();

                for (Post post : posts) {
                    String content = "";
                    content += "ID: " + post.getId() + "\n";
                    content += "User ID: " + post.getUserId() + "\n";
                    content += "Title: " + post.getTitle() + "\n";
                    content += "Text: " + post.getText() + "\n\n";

                    textViewResult.append(content);
                }
            }

            @Override
            public void onFailure(Call<List<Post>> call, Throwable t) {
                textViewResult.setText(t.getMessage());
            }
        });
    }
}
처음 retrofit 함수를 통해 데이터를 가져올 url 과 내가 파싱할 컨버터를 설정한다.
이후 retrofit 함수가 어떤 인터페이스를 통해 통신할 건지 설정한다.
Call 함수를 통해 데이터를 받아올 껍데기를 생성하고,
Callback 함수를 통해 데이터를 받아와서, Success과 Failure을 설정하여 데이터의 통신의 성공 실패 유무를 확인한다
만일 데이터가 로드되지 않는다면 logd(t)를 통해 데이터 통신의 실패 이유를 찾는다.
'Android' 카테고리의 다른 글
| Android Studio, JAVA] 피카소, Glide 라이브러리 (0) | 2020.07.31 |
|---|---|
| 안드로이드 스튜디오, JAVA 실습 : 영화 API 사이트에서 데이터 가져오기 (0) | 2020.07.30 |
| 안드로이드 스튜디오, JAVA] 스레드 (0) | 2020.07.28 |
| 실습 : 리사이클러뷰를 이용한 SNS화면 구현 (0) | 2020.07.23 |
| 안드로이드 스튜디오, JAVA] 리사이클러 뷰(recycler View) (0) | 2020.07.23 |


